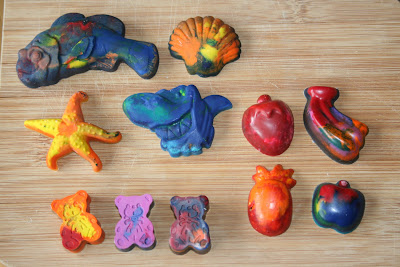
Directions
New or old broken crayons (same brand crayons look the best but not required)
Silicon molds/ ice cube trays (IKEA, craft stores, and many other places have cute shaped silicone molds)- Take all the crayons you can find. Have your kids peel off the paper.
- Break up the crayons into small pieces that will fit into your molds. Kids can break them up but you might need to go back with a knife for smaller pieces.
- Have the kids put the pieces into the molds. I like the rainbow effect but 1 color works too.
- Put filled molds on a baking sheet and into a preheated oven at 250 degrees. Melt between 15 to 25 minutes. Watch closely as oven cooking times vary. Once all pieces are melted remove carefully.
- Let cool completely before gently removing crayons from molds. You can speed up the time by putting the molds into the freezer.
This is a fun project to get the kids involved and make awesome gifts.
 |
| Paper removed and chopped up |
 |
| Placed in the molds |
 |
| Girls watching the melting |
 |
| Right out of the oven |
 |
| Finished Crayons |
 |
| Bats for Halloween class gifts |
No comments:
Post a Comment